 Last updated: July 30th, 2024
Troubleshooting A Garbage Disposal That Is Not Working: A Maintenance Guide
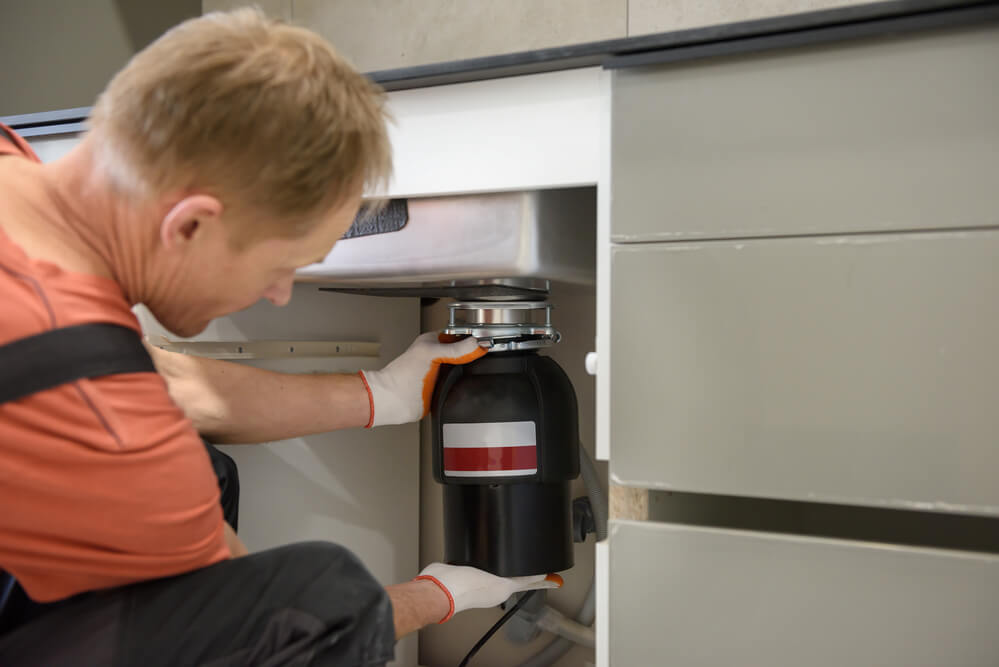
Garbage disposals are convenient kitchen appliances that grind food scraps, reduce waste, and clear the sink drain. However, like any mechanical device, they can malfunction for various reasons. Here’s a detailed guide to understanding why garbage disposals stop working and tips for efficiently maintaining them.
Common Causes of Garbage Disposal Issues
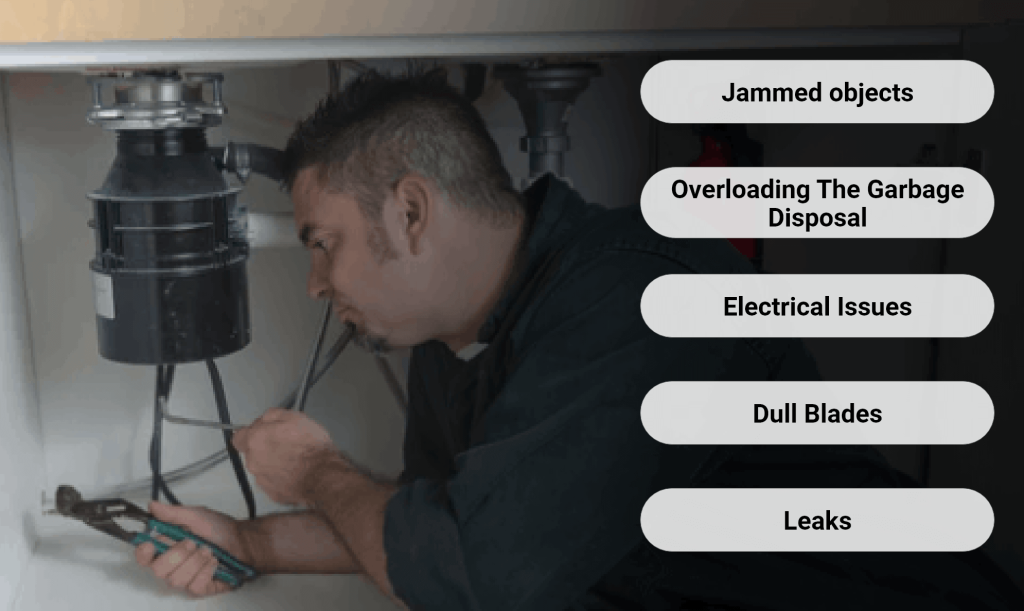
Some of the common issues that cause trouble with a garbage disposal are:
- Jammed objects
- Overloading The Garbage Disposal
- Electrical Issues
- Dull Blades
- Leaks
Detailed Overview Of The Causes Of Garbage Disposal Issues
This section delves deep into the causes of garbage disposal issues as it explores the nature of the cause, its consequences, and preventive measures to avoid them.
1. Jammed Objects
The most common cause of non-functioning disposal is a jam caused by foreign objects like bones, fruit pits, utensils, or other hard items that shouldn’t be put down the drain. These objects can jam the grinding mechanism, preventing the motor from turning.
Common Jamming Culprits
- Fibrous Materials: Fibrous vegetables like celery, corn husks, and artichoke hearts can wrap around the impellers (grinding blades), preventing them from rotating freely.
- Hard Objects: Bones, fruit pits, and hard shells can damage the impellers or become lodged between them, causing the motor to overload and potentially trip the internal overload protector.
- Non-Food Items: Metal objects like utensils, bottle caps, and jewelry can easily jam the disposal, causing severe damage to the impellers and motor.
Consequences of Jamming
- Impeller Blockage: Jammed objects can prevent the impellers from rotating, hindering the grinding process and straining the motor. This can lead to overheating and potential motor burnout.
- Overload Protector Trip: Garbage disposals have built-in overload protectors that trip when the motor experiences excessive strain. A jammed object can trigger this safety mechanism, causing the disposal to shut down completely.
- Motor Damage: In severe cases, jammed objects can damage the motor windings or bearings, requiring costly repairs or complete unit replacement.
Signs of a Jammed Garbage Disposal
- Humming Noise: If the disposal hums but doesn’t grind, it’s likely jammed with an object preventing the impellers from rotating.
- Burning Smell: A burning smell indicates the motor is overheating due to excessive strain from a jam.
- Tripped Overload Protector: If the disposal doesn’t turn on, the overload protector might be tripped due to a jam.
Prevention Tips
- Avoid Fibrous Materials: Cut fibrous vegetables into smaller pieces before disposal.
- No Hard Objects: Never put bones, fruit pits, or hard shells into the garbage disposal.
- Only Food Scraps: Garbage disposals are designed for food waste. Avoid putting non-food items like utensils, glass, or metal objects down the drain.
- Regular Cleaning: Run cold water with the disposal running for 30 seconds after grinding food scraps. This helps clear any remaining debris and prevents buildup.
2. Overloading The Garbage Disposal
Garbage disposals are convenient kitchen appliances, but overloading them can lead to various malfunctions. Here’s a detailed look at how overload impacts the disposal and the technical aspects involved:
Causes of Overload
- Excessive Food Waste: Putting too much food waste into the disposal at once exceeds its processing capacity. This can include large quantities of:
- Fruit and vegetable peels
- Bones
- Coffee grounds
- Fibrous vegetables like celery
- Fatty or greasy substances
- Improper Food Items: Disposing of items not designed for garbage disposals can cause jamming and overload. Examples include:
- Eggshells
- Nutshells
- Pasta
- Rice
- Coffee pods
Consequences of Overload
- Motor Overheating: The disposal motor is designed to handle a specific amount of food waste. Overload creates excessive strain, causing the motor to overheat. This can lead to:
- Tripped Overload Protector: Most garbage disposals have a built-in overload protector that shuts off the motor to prevent permanent damage. This manifests as the disposal suddenly stopping operation.
- Motor Burnout: In severe cases, prolonged overload can burn out the motor windings, requiring a complete disposal replacement.
- Jamming: Overloading can jam the impellers (grinding blades) with food waste, preventing them from rotating properly. This can also cause:
- Humming Sound: The motor might continue running without effectively grinding the waste, resulting in a humming noise.
- Burning Smell: Friction from a jammed disposal can generate a burning smell.
- Electrical Issues: In extreme overload situations, the high current draw can trip the circuit breaker, protecting the disposal circuit.
Preventing Overload
- Feed Food Waste Gradually: Add food waste in small batches, allowing the disposal to grind it effectively before adding more.
- Avoid Certain Items: Never put items not meant for garbage disposal, such as bones, coffee grounds, or fibrous vegetables.
- Run Cold Water: Running cold water while using the disposal helps flush food particles and prevents jams.
- Regular Cleaning: Clean the disposal regularly to remove any accumulated grease or debris that can contribute to jamming.
- Horsepower Rating: Garbage disposals are rated by horsepower (hp), indicating their motor power and waste processing capacity. Higher horsepower disposals can handle more significant amounts of food waste.
- Impeller Design: The impellers are designed to grind food waste into small particles that can easily flow through the plumbing system. Overloading can damage or dull the impellers, reducing their grinding efficiency.
- Thermal Overload Protector (TOP): This safety device automatically shuts off the motor when it reaches a critical temperature, preventing burnout. It typically features a reset button that needs to be pressed to restart the disposal after it cools down.
3. Electrical Issues
Garbage disposals are essential kitchen appliances, but their functionality relies heavily on a stable and consistent electrical supply. When electrical issues arise, they can manifest as various malfunctions, hindering the disposal’s operation. Here’s a detailed look at how common electrical problems impact garbage disposals:
Common Electrical Issues
- Tripped Circuit Breaker
The circuit breaker is a safety device that automatically shuts off power when it detects an overload or potential electrical fault. A tripped breaker can prevent the disposal from receiving power, rendering it inoperable.
Locate the circuit breaker panel and identify the breaker dedicated to the garbage disposal circuit. If tripped, reset the breaker by flipping the switch back to the “on” position. A more serious electrical issue might require professional attention if it immediately trips again.
- Faulty Wall Switch
The wall switch controls the power flow to the disposal. A faulty switch, with loose connections or internal damage, can disrupt the electrical circuit and prevent the disposal from turning on.
Check the wall switch for visible signs of damage, such as cracks or discoloration. If unsure, use a voltage tester to verify if power is reaching the switch. Loose connections within the switch box can be tightened, but a malfunctioning switch might need replacement.
- Loose or Damaged Wiring
Over time, vibrations from the disposal or other factors can cause wiring connections to loosen or become damaged. This disrupts the electrical flow and can lead to intermittent operation or complete disposal failure.
Inspect the wiring connections at the disposal unit and the wall switch box. Ensure all connections are secure and free of damage. Tighten loose connections with a screwdriver, but exercise caution and avoid over tightening. Consult a qualified electrician for repair or rewiring if significant damage is present.
- Power Cord Issues
A damaged power cord, with frayed wires or exposed conductors poses a safety hazard and can disrupt power delivery to the disposal.
Visually inspect the power cord for any signs of damage. Never attempt to use a damaged cord, as it can lead to electrical shock or fire hazards. Replace a damaged power cord with a new one that meets the disposal’s specifications.
Additional Considerations
- Ground Fault Circuit Interrupter (GFCI): Many modern garbage disposals are connected to a GFCI outlet, which provides additional protection against electrical shock. If the GFCI trips, it can prevent the disposal from functioning. Reset the GFCI button, but if it trips repeatedly, consult an electrician to identify the underlying issue.
- Voltage Requirements: Ensure the disposal receives the correct voltage as specified in its manual. Incorrect voltage can damage the motor and lead to malfunction.
Safety Precautions
- Always disconnect the power source before troubleshooting or repairing the disposal.
- If you need clarification on any electrical work, it’s best to consult a qualified electrician to ensure safety and proper repairs.
4. Dull Blades
Garbage disposals rely on sharp, rotating blades to grind food waste into tiny particles that can easily flow through the drainpipes. However, over time, these blades can become dull, leading to several malfunctioning issues:
Reduced Grinding Efficiency
- Dull blades: As they lose their sharpness, they become less effective at grinding food waste. This results in larger food particles remaining in the disposal, potentially causing clogs and slow drainage.
- Uneven grinding: Dull blades might grind food unevenly, leaving chunks that can further contribute to clogs and hinder the disposal’s smooth operation.
Increased Motor Strain
- Higher torque requirement: The motor needs to exert more torque to compensate for the reduced grinding efficiency of dull blades. This increased strain can lead to:
- Overheating: The motor may overheat due to the increased workload, potentially tripping the overload protector and shutting down the disposal.
- Premature motor failure: In severe cases, prolonged strain from dull blades can lead to premature motor failure, requiring a complete disposal replacement.
Other Potential Issues
- Unpleasant odors: Food particles stuck in the disposal due to inefficient grinding can decompose and create foul odors.
- Increased noise: Dull blades may generate more noise during operation due to uneven grinding and increased motor strain.
Technical Details
- Blade Design: Garbage disposal blades are typically stainless steel and have a serrated edge for efficient grinding. However, these edges become dull over time due to friction and contact with various food items.
- Motor Specifications: Garbage disposal motors are designed to handle a specific torque load. When dull blades increase the torque requirement, the motor operates outside its optimal parameters, leading to potential damage.
- Overload Protector: Most garbage disposals have an overload protector that automatically shuts down the motor to prevent overheating and damage.
Prevention & Solutions
- Regular Use: Running the disposal regularly with water and ice cubes can help clean and sharpen the blades to a certain extent.
- Avoid Grinding Hard Materials: Do not put bones, eggshells, coffee grounds, or fibrous materials like banana peels into the disposal, as these can quickly dull the blades.
- Cleaning and Sharpening Techniques: While true sharpening isn’t possible, using ice cubes, rock salt, or disposal cleaning products can help remove debris and temporarily improve grinding efficiency.
- Professional Maintenance: In cases of severe dullness or suspected motor damage, consider professional maintenance or replacement of the disposal unit.
5. Leaks In Garbage Disposal
Garbage disposals are essential kitchen appliances that grind food waste, preventing clogs in your plumbing system. However, leaks in a garbage disposal can lead to various malfunctions and pose safety hazards. Here’s a detailed look at common leak locations and their effects on the garbage disposal:
Sink Flange
- Location: The connection point between the sink drain and the garbage disposal.
- Leak Cause: Worn-out rubber gasket, loose mounting bolts, or damaged putty.
- Malfunction Impact: Water leaks can damage the disposal’s electrical components, leading to motor failure, overheating, and potential electrical hazards. Additionally, loose connections can cause the disposal to vibrate excessively during operation, increasing noise and potentially damaging the unit.
Gaskets
- Location: Internal seals within the disposal, such as the motor shaft seal and the grinding chamber gasket.
- Leak Cause: Natural wear and tear over time, improper installation, or damage from foreign objects.
- Malfunction Impact: Leaks from internal gaskets can allow water to mix with the electrical components, posing a safety risk. Water leaking into the grinding chamber can dull the blades, reducing efficiency and potentially causing clogs.
Cracks Or Holes
- Location: Can occur on the disposal body, grinding chamber, or motor housing.
- Leak Cause: Corrosion due to age, exposure to harsh chemicals, or impact damage.
- Malfunction Impact: Cracks or holes compromise the disposal’s structural integrity, leading to water leaks and potential electrical hazards. Additionally, leaks can damage the internal components, leading to complete failure.
Technical Considerations
- Electrical Safety: Water and electricity are a dangerous combination. Leaks near the motor or electrical components can cause short circuits, overheating, and fire hazards.
- Motor Damage: Water intrusion can damage the motor bearings and windings, leading to decreased performance, overheating, and eventual motor failure.
- Corrosion: Leaks accelerate the corrosion of metal components within the disposal, further weakening its structure and shortening its lifespan.
Preventative Measures
- Regular Inspections: Check for leaks around the sink flange, disposal body, and connections at least once a month.
- Gasket Maintenance: Replace worn-out gaskets promptly to prevent leaks and ensure proper sealing.
- Corrosion Protection: Avoid using harsh chemicals that can damage the disposal’s metal components.
- Proper Installation: Ensure the disposal is securely mounted and all connections are tight to prevent leaks.
Troubleshooting Common Garbage Disposal Issues
Garbage disposals are workhorses in the kitchen, grinding food scraps and preventing clogs in your plumbing system. However, like any appliance, they can encounter various issues that hinder their functionality.
Here’s a detailed guide to troubleshooting common garbage disposal problems:
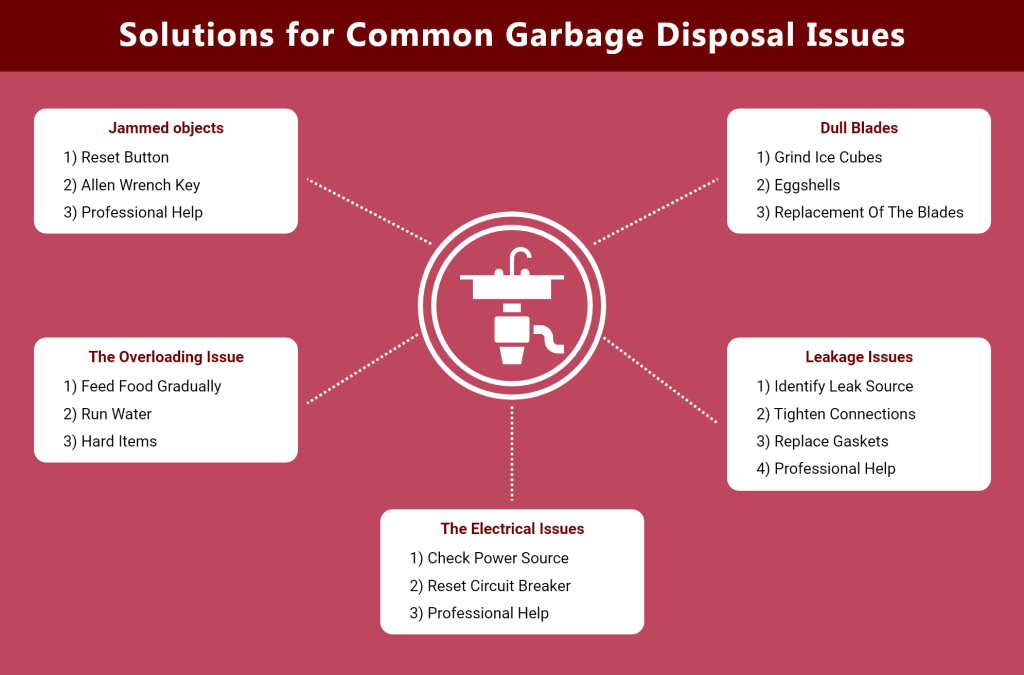
– Solutions To Deal With Jammed Objects
- Reset Button: Most disposals have a reset button located on the bottom. Press the reset button briefly to see if it clears the jam.
- Allen Wrench Key: If the reset button doesn’t work, locate the small hex key slot on the underside of the disposal. Insert the Allen wrench key provided with your disposal or a suitable-sized wrench and turn it slowly back and forth to try to dislodge the object. Avoid forcing the wrench, as this could damage the blades.
- Professional Help: If the above methods fail, call a plumber to remove the object safely and assess any potential damage.
– Solutions To Deal With The Overloading Issue
- Feed Food Gradually: Add food waste in small batches, allowing the disposal to grind each piece thoroughly before adding more.
- Run Water: Keep cold water running while using the disposal and for a few seconds afterward to help flush food particles and prevent clogging.
- Hard Items: Avoid putting hard or fibrous materials like corn husks, bones, or coffee grounds into the disposal, as they can dull the blades and contribute to jams.
– Solutions To Deal With The Electrical Issues
- Check Power Source: Ensure the disposal and outlet are firmly plugged in correctly.
- Reset Circuit Breaker: If the circuit breaker has tripped, reset it and try rerunning the disposal. A more significant electrical issue might require professional attention if it trips repeatedly.
- Professional Help: If you suspect internal motor problems, call a qualified appliance repair technician to diagnose and repair the electrical components.
– Solutions To Deal With Dull Blades
- Grind Ice Cubes: Occasionally, running a handful of ice cubes through the disposal can help sharpen the blades slightly.
- Eggshells: Crushing eggshells in the disposal can also provide some abrasion to sharpen the blades.
- Replacement Of The Blades: If the blades are excessively dull, replacing them with new ones might be necessary.
– Solutions To Deal With Leakage Issues
- Identify Leak Source: Pinpoint the exact location of the leak to determine the necessary repair.
- Tighten Connections: If the leak is around the sink flange, tighten the mounting bolts or replace the putty ring.
- Replace Gaskets: For leaks around internal gaskets, replace them with new ones that fit the specific disposal model.
- Professional Help: If the disposal has cracks or severe leaks, consult a plumber to assess the damage and determine whether repairs are feasible or need replacement.
Keeping Your Garbage Disposal Running Smoothly: Essential Maintenance Tips
Garbage disposals are convenient kitchen tools, but like any appliance, they require proper care to function optimally and avoid costly repairs. Here are some essential maintenance tips to keep your disposal running smoothly:
Regular Cleaning
- Weekly Grind: Run the disposal for 30 seconds with cold water to grind any leftover food particles and prevent buildup.
- Deep Clean (Monthly):
- Ice Cubes and Salt: Grind a handful of ice cubes, followed by a cup of rock salt. This helps sharpen the blades and remove debris.
- Baking Soda and Vinegar: Pour a cup of baking soda followed by a cup of white vinegar. The fizzing action helps loosen grime and deodorize the disposal. Flush with cold water afterward.
- Citrus Peels: Occasionally grind citrus peels like orange or lemon rinds for a natural deodorizer.
Preventative Measures
- Mind What Goes Down the Drain: Avoid putting hard or fibrous materials like bones, fruit pits, coffee grounds, eggshells, or corn husks into the disposal. These can damage the blades and contribute to jams.
- Use Cold Water: Always run cold water while using the disposal and for a few seconds afterward. This helps flush food particles and prevents grease buildup.
- Sharpening the Blades: Periodically grind ice cubes to help sharpen the blades and maintain grinding efficiency.
- Listen for Unusual Sounds: If you hear loud noises, grinding sounds, or the motor struggling, it might indicate a jam or other issue. Address the problem promptly.
- Reset Button: Most disposals have a reset button located on the bottom. Press it if the motor overheats and trips the overload protector.
- Professional Help: For complex issues like persistent leaks, electrical problems, or motor failure, consult a qualified plumber for diagnosis and repair.
- Disposal Lubricant: Some manufacturers recommend occasionally using a specific disposal lubricant to keep the unit running smoothly and prevent corrosion. Consult your owner’s manual for specific recommendations.
A Detailed Guide to Cleaning Your Garbage Disposal: Keeping It Fresh and Functional
Clean garbage disposal prevents odors, clogs, and potential damage. Always unplug the disposal or turn off the circuit breaker before starting any cleaning procedures. This prevents accidental activation while your hands are inside the disposal.
Here’s a comprehensive guide, including technical details, to ensure your disposal operates optimally:
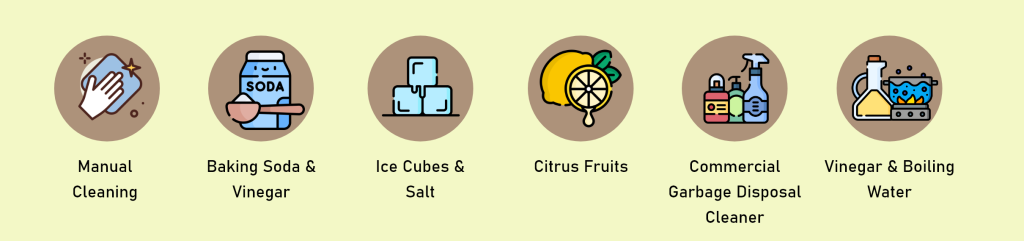
Cleaning Methods
- Manual Cleaning
- Tools:
- Flashlight
- Long-handled brush with a narrow head (bottle brush or toothbrush)
- Sponge
- Dish soap
- Bucket of warm water
- Process:
- Unplug the disposal: Always ensure the disposal is off before starting any cleaning procedures.
- Shine a light: Use a flashlight to inspect the inside of the grinding chamber. Look for any visible food debris, grease buildup, or rust.
- Brush and scrub: Dip the long-handled brush in warm, soapy water and scrub the inside of the grinding chamber, paying close attention to the blades and grinding plate. Remove any visible debris or buildup.
- Clean the splash guard: If your disposal has a removable splash guard, clean it with warm, soapy water and a sponge. Rinse thoroughly and reinstall it securely.
- Rinse thoroughly: Flush the disposal with cold water for at least 30 seconds to remove any remaining soap or debris.
- Tools:
- Baking Soda & Vinegar
- Ingredients:
- 1/2 cup baking soda, 1 cup white vinegar.
- Process:
- Pour the baking soda into the disposal.
- Slowly add the vinegar. The mixture will fizz, helping to loosen food debris and deodorize.
- Let the mixture sit for 15-30 minutes.
- Run cold water for 30 seconds to flush the disposal.
- Ingredients:
- Ice Cubes & Salt
- Ingredients:
- 2 cups ice cubes, 1 cup coarse salt (rock salt or kosher salt).
- Process:
- Turn on the disposal and slowly add the ice cubes.
- Pour in the salt.
- The ice is an abrasive cleaner, while the salt helps scour the blades and grinding chamber.
- Run the disposal with cold water for 30 seconds to flush out debris.
- Ingredients:
- Citrus Fruits
- Ingredients:
- 1 lemon or orange, cut into wedges.
- Process:
- With the disposal running, feed the citrus wedges one at a time.
- Citric acid helps deodorize and remove light buildup.
- Follow with cold water for 30 seconds to rinse.
- Ingredients:
- Commercial Garbage Disposal Cleaner
- Follow Instructions:
- Choose a reputable brand and follow the specific instructions on the product label.
- These cleaners often contain disinfectants and deodorizers for a deeper clean.
- Follow Instructions:
- Vinegar & Boiling Water
- Ingredients:
- 1 cup white vinegar and 1 pot of boiling water.
- Process:
- Pour the vinegar into the disposal.
- Slowly follow with the boiling water.
- The hot water helps to melt grease and loosen any stuck-on debris.
- Run cold water for 30 seconds to flush the disposal.
- Ingredients:
-
- Caution:
- Be careful when handling boiling water to avoid burns.
- Caution:
Additional Tips
- Run Cold Water: Always run cold water while using the disposal and for a few seconds afterward. This helps to flush food particles and prevent clogging.
- Avoid Certain Foods: Don’t put grease, coffee grounds, egg shells, fibrous vegetables, or large bones into the disposal, as these can contribute to clogs and dull the blades.
- Monthly Cleaning: Regularly clean your disposal once a month to maintain optimal performance and prevent unpleasant odors.
- Baffle Removal (Optional): Some disposals have removable baffles that trap large food particles. If your disposal has a removable baffle, clean it with warm, soapy water and a sponge. Rinse thoroughly and reinstall it securely.
- Manual Cleaning (For Stubborn Build-up): In cases of heavy buildup, you might need to manually clean the grinding chamber using a long-handled brush with a narrow head. Wet the brush with warm, soapy water and scrub the inside of the disposal, paying attention to the blades and grinding plate. Rinse thoroughly with running water.
Garbage Disposal And Home Warranty: Understanding The Coverage
Understanding the coverage for garbage disposals under a home warranty is essential for homeowners to avoid unexpected repair or replacement costs. Here’s an in-depth look at what to expect regarding coverage and a review of top home warranty companies that include garbage disposals in their plans.
Top Home Warranty Companies Covering Garbage Disposal Repairs
$100 OFF and Free Roof Coverage

Premium
$54.99 - $89.99
Deductible
$75.00 - $125.00
Coverage Limit
$4K - $5K
Why We Picked It
AHS is known for its comprehensive coverage. Their plans typically include garbage disposals under both their ShieldGold and ShieldPlatinum plans.
$50 off + 1 Month Free

Premium
$46 - $55
Deductible
$75 - $125
Coverage Limit
Upto $3K/item
Why We Picked It
CHW is known for its competitive pricing and reliable service. It covers garbage disposals under its Basic and Total Plans.
$150 OFF and 2 Months Free + Free Roof Coverage

Premium
$54.99 - $64.99
Deductible
$60.00 - $125.00
Coverage Limit
$3K/Item
Why We Picked It
SHW offers affordable plans and regular promotions, making it a cost-effective choice. Garbage disposals are included in their Gold Care, Bronze Care, and Platinum Care plans.
What Gets Covered
Under most home warranty plans, the following aspects of garbage disposal are typically covered:
- Parts and Components: Coverage often extends to various parts and components of the garbage disposal unit, such as blades, seals, and switches, if they fail due to normal usage.
- Labor Costs: Many home warranty plans cover the costs of labor for repairs or replacements of covered items, ensuring that homeowners don’t have to bear the entire expense themselves.
Conclusion: Keeping Your Garbage Disposal Functioning Smoothly
A well-maintained garbage disposal is a valuable asset in your kitchen, preventing clogs and ensuring smooth operation. By understanding the common causes of malfunctions, such as jammed objects, overloading, electrical issues, dull blades, and leaks, you can effectively troubleshoot problems and restore functionality.
This guide has detailed instructions on various troubleshooting techniques, including technical considerations and safety precautions. Remember, addressing issues promptly can prevent further damage, potential safety hazards, and the need for costly repairs or replacements.
By following these tips and adopting a proactive approach to maintenance, you can keep your garbage disposal functioning optimally for years to come, ensuring a clean and efficient kitchen environment.


related articles
 Discover First American Home Warranty Locations and What You Need to Know About Their Cover.
 Reviews of Home Warranty Companies Show You How to Determine If Your Home Is Covered


- Free Instant Quotes
- Upto $200 Off
- Free Roof Coverage