 Last updated: August 19th, 2024
Top 10 Home Maintenance Tips: Keeping Your Home in Pristine Condition
Owning a home is a significant investment, and regular maintenance is crucial to ensure it remains in top condition. This will preserve its value and provide a safe and comfortable living environment. Here are the top 10 home maintenance tips every homeowner should know.
1. Regular Roof Inspections and Repairs
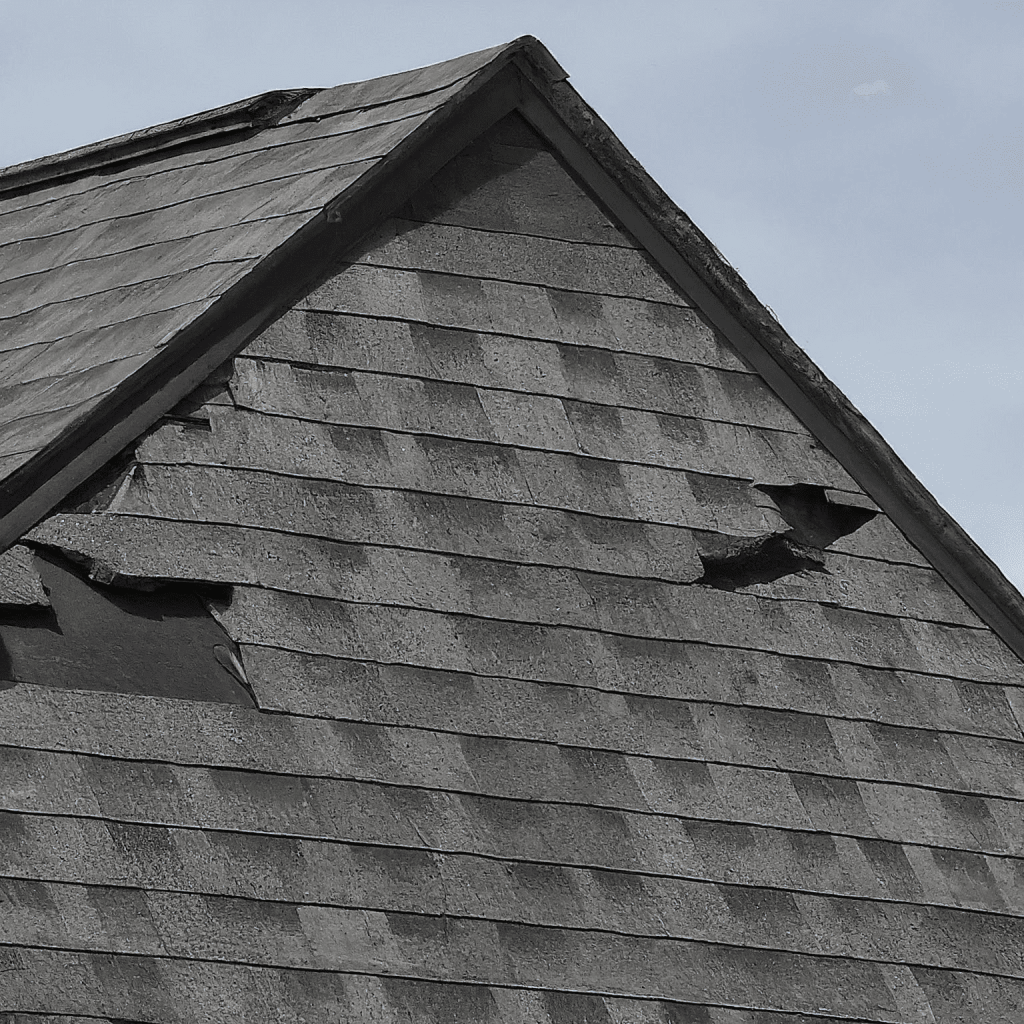
Importance of Regular Roof Inspections
Regular roof inspections help identify potential problems before they become significant, saving you from costly repairs and extensive damage. Key benefits of regular roof inspections include:
- Early Detection of Problems: Early detection of leaks, damaged shingles, and structural weaknesses can prevent more severe damage.
- Extended Roof Lifespan: Regular maintenance can significantly extend the life of your roof, delaying the need for a total replacement.
- Energy Efficiency: Ensuring your roof is in good condition helps maintain proper insulation, reducing heating and cooling costs.
- Preventing Water Damage: Timely repairs can prevent leaks, which can lead to water damage, mold growth, and compromised structural integrity.
Common Issues to Look For
During a roof inspection, look for the following common issues:
- Damaged or Missing Shingles: Cracked, curling, or missing shingles can expose your roof to water infiltration.
- Leaks and Water Stains: Check for water stains on ceilings and walls, which can indicate a roof leak.
- Moss and Algae Growth: Moss and algae can trap moisture, leading to roof deterioration.
- Sagging Areas: Sagging or uneven sections may indicate structural problems that need immediate attention.
- Flashing Damage: Inspect flashing around chimneys, vents, and skylights for cracks or rust.
- Granule Loss: Excessive granules in gutters can indicate shingle wear and tear.
DIY Roof Repair Tips
You can tackle the job yourself with the suitable materials and tools for minor repairs. Here are some common DIY roof repair tasks:
- Replacing Damaged Shingles
Materials Needed: Replacement shingles, roofing nails, hammer, pry bar, roofing cement.
#Steps:
- Carefully lift the damaged shingle with a pry bar.
- Remove nails and slide out the damaged shingle.
- Slide the new shingle into place and secure it with roofing nails.
- Apply roofing cement to seal the edges.
- Fixing Small Leaks
Materials Needed: Roofing sealant, caulking gun, putty knife.
#Steps:
- Locate the source of the leak.
- Apply roofing sealant to the area using a caulking gun.
- Spread the sealant evenly with a putty knife.
- Cleaning Moss and Algae
Materials Needed: Moss and algae cleaner, scrub brush, garden hose.
#Steps:
- Apply the cleaner according to the manufacturer’s instructions.
- Gently scrub the affected areas with a brush.
- Rinse thoroughly with a garden hose.
Typical Maintenance Costs
Regular roof maintenance costs can vary based on the size of your roof, materials, and extent of repairs needed. Here are some estimated costs:
- Professional Roof Inspection: $100 to $300
- Shingle Replacement: $30 to $100 per bundle of shingles
- Roof Repair (Minor): $150 to $400
- Roof Cleaning: $200 to $600
- Full Roof Replacement: $5,000 to $10,000 or more, depending on the size and materials
2. Inspect and Service HVAC Systems
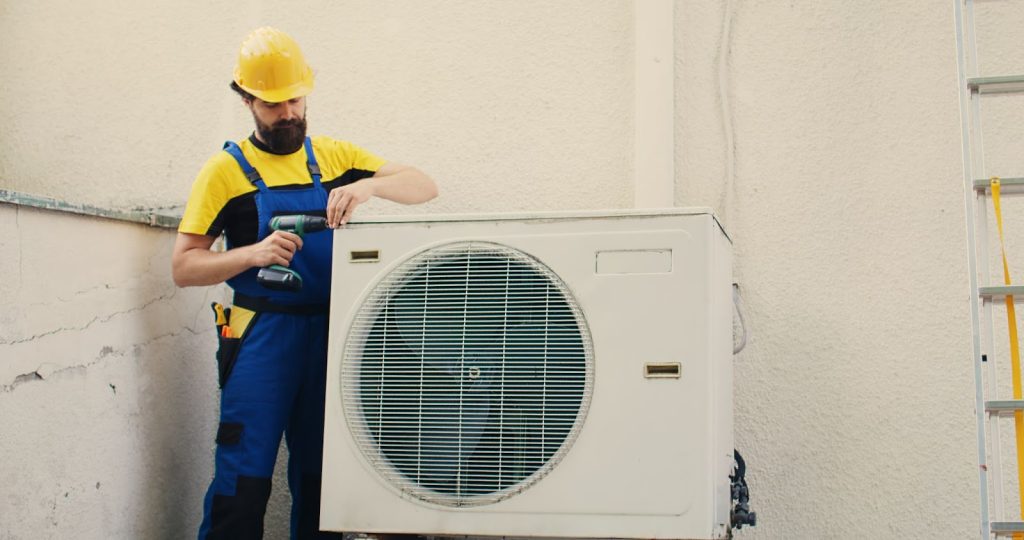
Your heating, ventilation, and air conditioning (HVAC) systems should be serviced at least once a year to ensure they operate efficiently. Change air filters every 1-3 months to maintain good indoor air quality and reduce strain on your system. Regular maintenance of HVAC units can prevent breakdowns and extend their lifespan.
Importance of Regular HVAC Maintenance
Regular maintenance of your HVAC system offers several benefits:
- Improved Efficiency: Well-maintained systems run more efficiently, reducing energy consumption and lowering utility bills.
- Extended Lifespan: Routine care can prolong the life of your HVAC system, delaying the need for a costly replacement.
- Enhanced Air Quality: Clean systems improve indoor air quality by reducing dust, allergens, and pollutants.
- Fewer Breakdowns: Regular inspections help identify and fix minor issues before they become major ones.
Common HVAC Issues to Look For
When inspecting your HVAC system, keep an eye out for these common issues:
- Dirty Filters: Clogged filters restrict airflow, making your system work harder and less efficiently.
- Thermostat Problems: Faulty thermostats can lead to inconsistent temperatures and reduced system efficiency.
- Leaking Ducts: Leaks in ductwork can cause air loss, reducing the efficiency of your HVAC system.
- Refrigerant Leaks: Low refrigerant levels can decrease cooling efficiency and indicate a leak that needs fixing.
- Strange Noises: Unusual sounds, such as grinding or squealing, can indicate mechanical issues.
- Poor Airflow: Weak airflow can result from blocked vents, dirty filters, or issues with the blower motor.
DIY HVAC Maintenance Tasks
Here are some DIY maintenance tasks that can help keep your HVAC system running smoothly:
- Replacing Air Filters
Materials Needed: Replacement air filters.
#Steps:
- Locate the filter compartment, usually near the air handler or furnace.
- Remove the old filter and note its size.
- Insert the new filter, ensuring it’s adequately oriented according to the airflow direction marked on the filter.
- Cleaning the Outdoor Unit
Materials Needed: Garden hose, coil cleaner (optional).
#Steps:
- Turn off the power to the unit.
- Remove any debris around the unit.
- Use a garden hose to rinse the fins from the inside out gently. Avoid using high pressure.
- For stubborn dirt, apply coil cleaner per the manufacturer’s instructions and rinse thoroughly.
- Clearing Clogged Condensate Drain Lines:
Materials Needed: Wet/dry vacuum, vinegar.
#Steps:
- Locate the condensate drain line, usually near the indoor air handler.
- Use a wet/dry vacuum to remove blockages from the drain line.
- Pour a cup of vinegar into the drain line to help prevent future clogs.
Typical HVAC Maintenance Costs
Regular HVAC maintenance costs can vary depending on the type of service and system. Here are some estimated costs:
- Professional HVAC Inspection: $75 to $200
- Annual Maintenance Contract: $150 to $500
- Air Filter Replacement: $10 to $50 per filter
- Duct Cleaning: $300 to $500
- Refrigerant Recharge: $100 to $350
3. Check for Plumbing Leaks and Drips
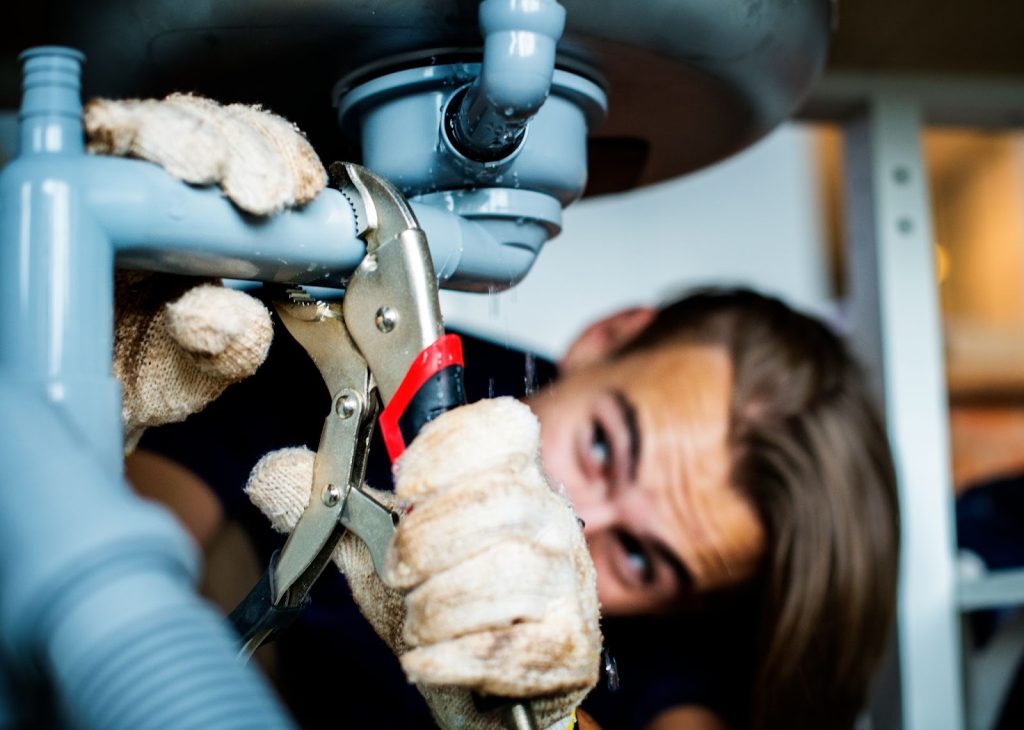
Water leaks can cause significant damage and increase your utility bills. Regularly inspect faucets, showerheads, and under-sink pipes for leaks. Check your water heater for signs of rust or corrosion and ensure it’s operating efficiently. Address any leaks immediately to prevent mold growth and structural damage.
Importance of Checking for Plumbing Leaks and Drips
Regularly inspecting your plumbing for leaks and drips is essential for several reasons:
- Prevent Water Damage: Unchecked leaks can cause extensive damage to walls, floors, and foundations.
- Reduce Water Bills: Fixing leaks can significantly reduce water consumption and utility bills.
- Prevent Mold Growth: Moist environments created by leaks are ideal for mold growth, which can pose health risks.
- Maintain Structural Integrity: Persistent leaks can weaken structural elements of your home, leading to costly repairs.
Common Plumbing Leaks and Drips
Leaks can occur in various parts of your plumbing system. Here are common areas to check:
Faucets and Showerheads
- Dripping faucets and showerheads are easy to spot.
- Look for water pooling around the base or dripping from the spout.
Under-Sink Pipes
- Inspect pipes under sinks for moisture or water stains.
- Check for dampness or puddles in the cabinet or area below the sink.
Toilets
- Listen for running water when the toilet is not in use.
- Check for water around the base of the toilet.
Water Heaters
- Look for water pooling around the base of the water heater.
- Inspect for rust or corrosion on the tank.
Exposed Pipes:
- Check exposed pipes in basements, crawl spaces, and utility rooms for moisture or dripping.
Ceilings and Walls
- Look for water stains, bubbling paint, or damp spots, which may indicate hidden leaks.
DIY Tips for Fixing Common Plumbing Leaks
Many minor plumbing leaks can be fixed with some basic DIY skills. Here are steps to address common issues:
- Fixing a Dripping Faucet
Materials Needed: Replacement washers or O-rings, screwdriver, wrench.
#Steps:
- Turn off the water supply to the faucet.
- Disassemble the faucet handle using a screwdriver.
- Remove the valve stem and inspect the washer or O-ring.
- Replace worn or damaged washers or O-rings.
- Reassemble the faucet and turn the water supply back on.
- Repairing Leaky Pipes Under Sinks
Materials Needed: Pipe wrench, plumber’s tape, pipe sealant, replacement pipe or fittings if needed.
#Steps:
- Turn off the water supply to the affected pipe.
- Use a pipe wrench to disconnect the leaking pipe or fitting.
- Apply the plumber’s tape to the threads of the new pipe or fitting.
- Reconnect the pipe and tighten it securely with the wrench.
- Turn the water supply back on and check for leaks.
- Sealing a Leaky Toilet Base
Materials Needed: Plumber’s putty or caulk, wrench, replacement wax ring (if needed).
#Steps:
- Turn off the water supply to the toilet.
- Remove the nuts securing the toilet to the floor using a wrench.
- Lift the toilet and check the wax ring for damage.
- Replace the wax ring if necessary and reseat the toilet.
- Secure the toilet to the floor and apply the plumber’s putty or caulk around the base.
- Stopping a Running Toilet:
Materials Needed: Replacement flapper valve or fill valve, screwdriver.
#Steps:
- Turn off the water supply to the toilet.
- Remove the tank lid and inspect the flapper valve and fill valve.
- Replace the flapper valve if it is worn or damaged.
- If the fill valve is faulty, replace it following the manufacturer’s instructions.
- Turn the water supply back on and check for proper operation.
Typical Maintenance Costs
The costs associated with fixing plumbing leaks and drips can vary based on the severity of the issue and whether you hire a professional or do it yourself. Here are some estimated costs:
- DIY Faucet Repair Kit: $10 to $30
- Replacement Washers or O-rings: $1 to $10
- Pipe Sealant or Plumber’s Tape: $2 to $10
- Professional Faucet Repair: $75 to $150
- Professional Leak Detection and Repair: $150 to $500
- Replacing a Wax Ring: $10 to $25 for DIY, $50 to $150 for professional service
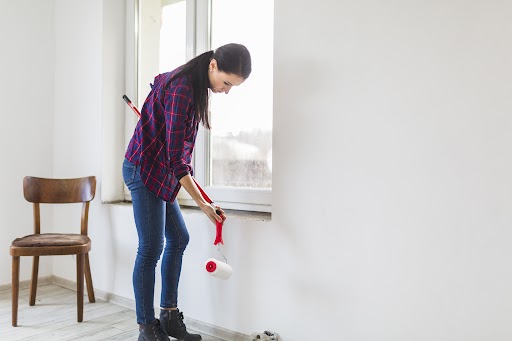
4. Service and Clean Appliances
Regular maintenance of household appliances can prevent unexpected breakdowns and extend their lifespan. Clean refrigerator coils to improve efficiency, inspect washing machine hoses for leaks or wear, and clean dryer vents to prevent fire hazards. Follow the manufacturer’s maintenance recommendations for each appliance.
Importance of Servicing and Cleaning Appliances
Proper servicing and cleaning of appliances offer several benefits:
- Extended Lifespan: Regular maintenance helps prevent premature wear and tear.
- Improved Efficiency: Clean appliances operate more efficiently, reducing energy consumption.
- Safety: Regular checks can prevent hazards such as electrical fires or gas leaks.
- Cost Savings: Well-maintained appliances are less likely to break down, saving you from costly repairs or replacements.
Common Household Appliances and Maintenance Tips
a. Refrigerator

Maintenance Tips:
- Clean Coils: Dust and debris on the condenser coils can cause the refrigerator to overheat and work harder.
- Check Door Seals: Ensure the seals are tight and cracks-free to maintain efficiency.
- Defrost Freezer: Regularly defrost manual defrost freezers to prevent ice buildup.
DIY Steps:
Clean Coils:
- Unplug the refrigerator.
- Use a coil brush to remove dust and debris from the coils, usually at the back or underneath the fridge.
- Vacuum the area to remove any remaining dirt.
Check Door Seals
- Clean the seals with warm, soapy water.
- Dry thoroughly with a towel.
- Inspect for any cracks or gaps and replace the seals if necessary.
Maintenance Costs:
- DIY Coil Brush: $5 to $15
- Replacement Door Seals: $20 to $50
- Professional Refrigerator Cleaning: $75 to $150
b. Washing Machine
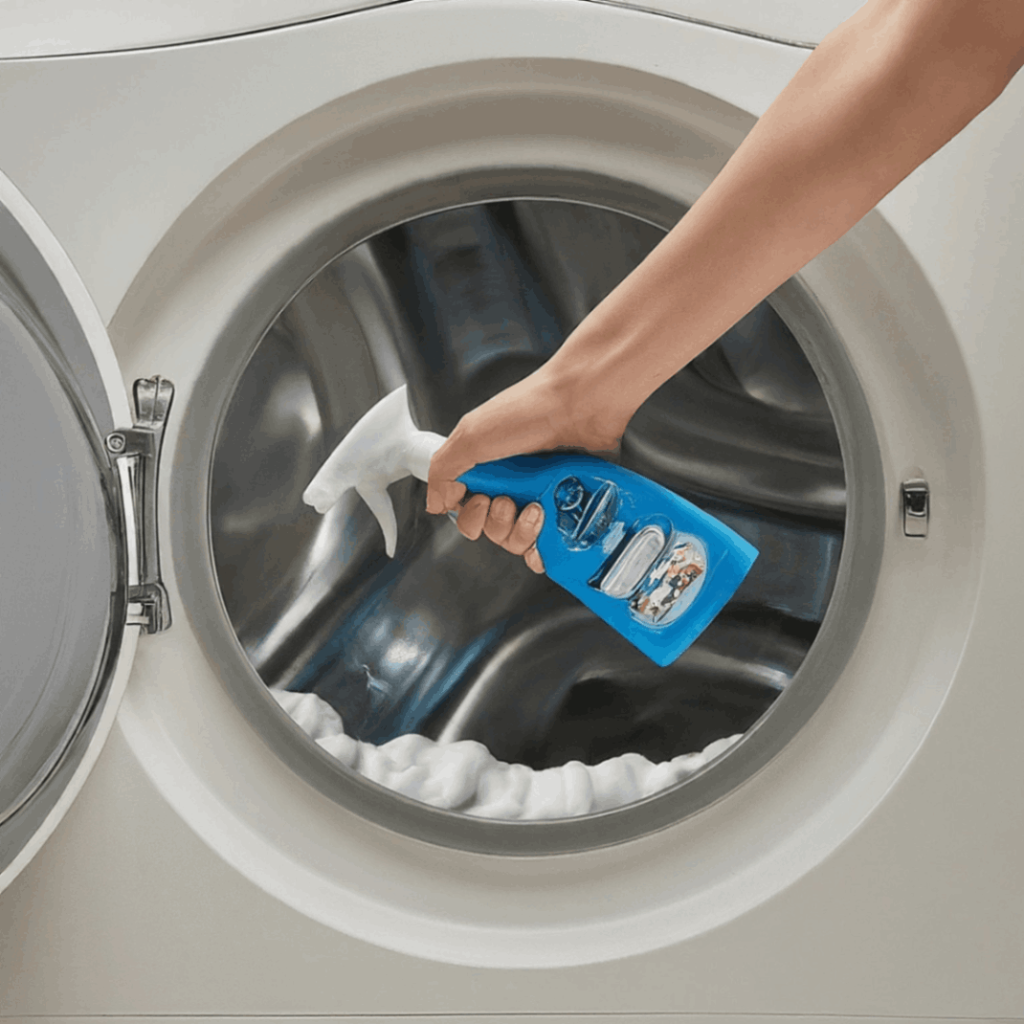
Maintenance Tips:
- Clean Drum and Gaskets: Prevent mold and mildew buildup.
- Check Hoses: Inspect for leaks or wear and replace if necessary.
- Balance the Machine: Ensure its level to prevent excessive vibration and wear.
DIY Steps:
Clean Drum and Gaskets
- Run an empty wash cycle with hot water, adding 2 cups of white vinegar.
- Follow with another empty cycle, adding 1/2 cup of baking soda.
- Wipe down the door gasket with a cloth dipped in vinegar.
Check Hoses
- Inspect hoses for cracks, bulges, or leaks.
- Replace any damaged hoses.
Maintenance Costs
- DIY Vinegar and Baking Soda: $5 to $10
- Replacement Hoses: $10 to $30
- Professional Washing Machine Maintenance: $50 to $100
c. Dryer
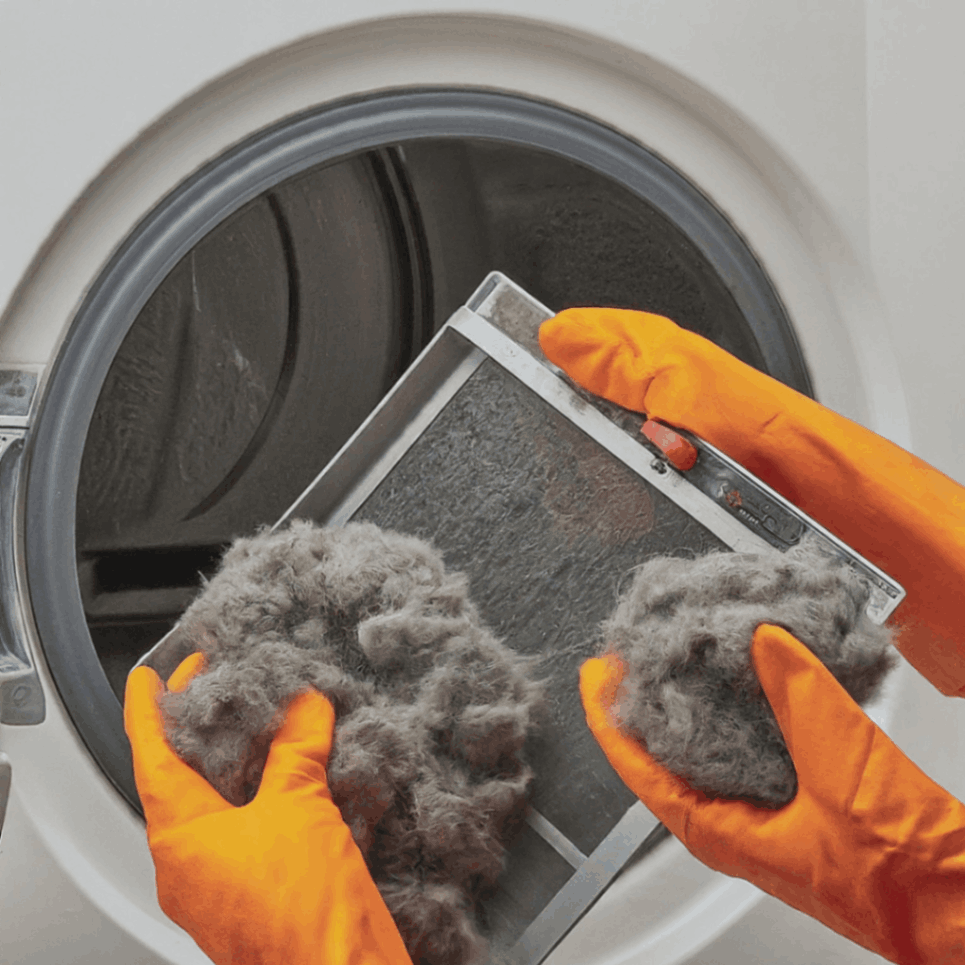
Maintenance Tips:
- Clean Lint Trap: After every load, prevent fires and improve efficiency.
- Inspect Vent System: Ensure it’s clear of obstructions and lint buildup.
DIY Steps:
Clean Lint Trap
- Remove the lint trap.
- Clean off all the lint.
- Replace the lint trap.
Inspect Vent System
- Disconnect the dryer from the power source.
- Use a vent cleaning brush to remove lint from the vent.
- Vacuum any debris from the vent opening.
Maintenance Costs:
- DIY Vent Cleaning Brush: $10 to $30
- Professional Dryer Vent Cleaning: $70 to $150
d. Dishwasher
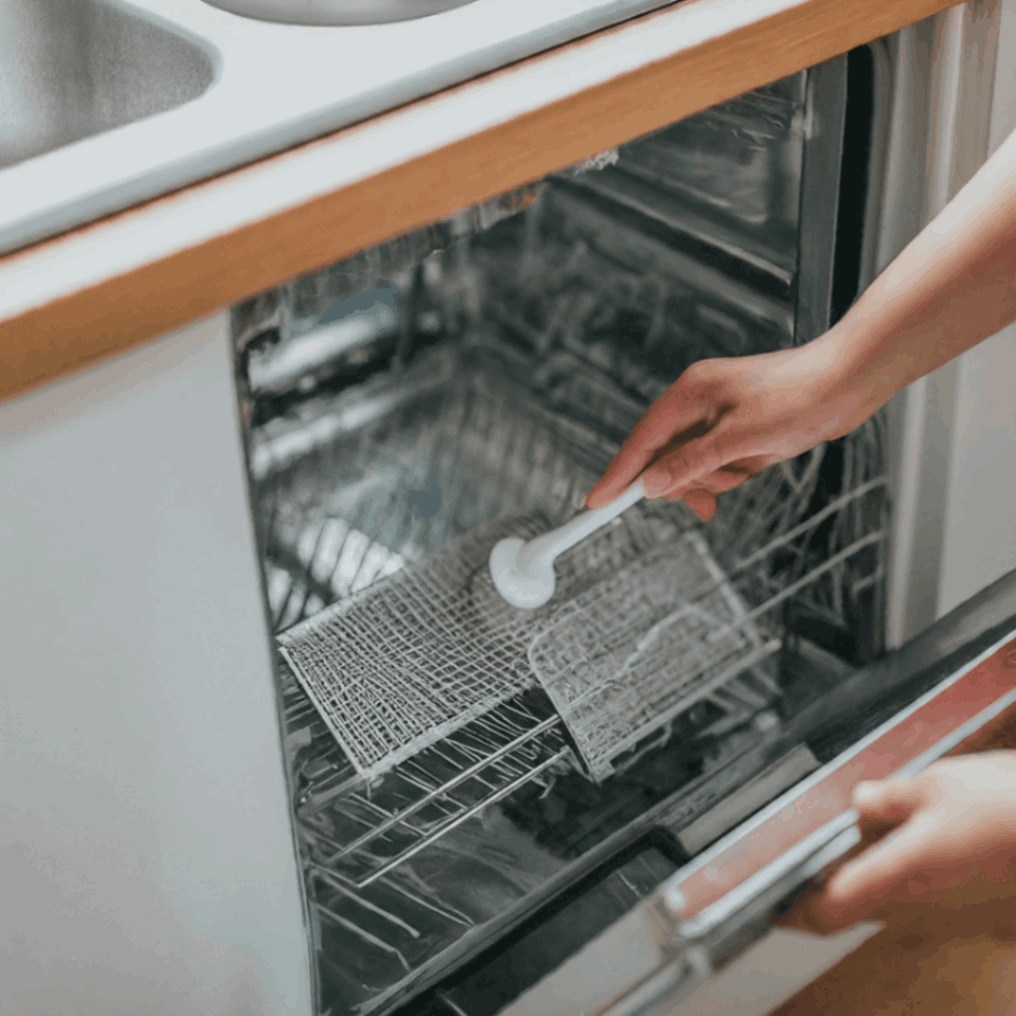
Maintenance Tips:
- Clean Filter: Regularly clean to ensure proper drainage and efficiency.
- Run Cleaning Cycle: Use a dishwasher cleaner to remove buildup and odors.
DIY Steps:
Clean Filter
- Remove the filter, usually located at the bottom of the dishwasher.
- Soak in warm, soapy water.
- Scrub with a brush and rinse thoroughly before replacing.
Run Cleaning Cycle
- Place the dishwasher cleaner in the machine.
- Run an empty cycle on the hottest setting.
Maintenance Costs:
- DIY Dishwasher Cleaner: $5 to $15
- Professional Dishwasher Maintenance: $50 to $100
e. Oven and Stove
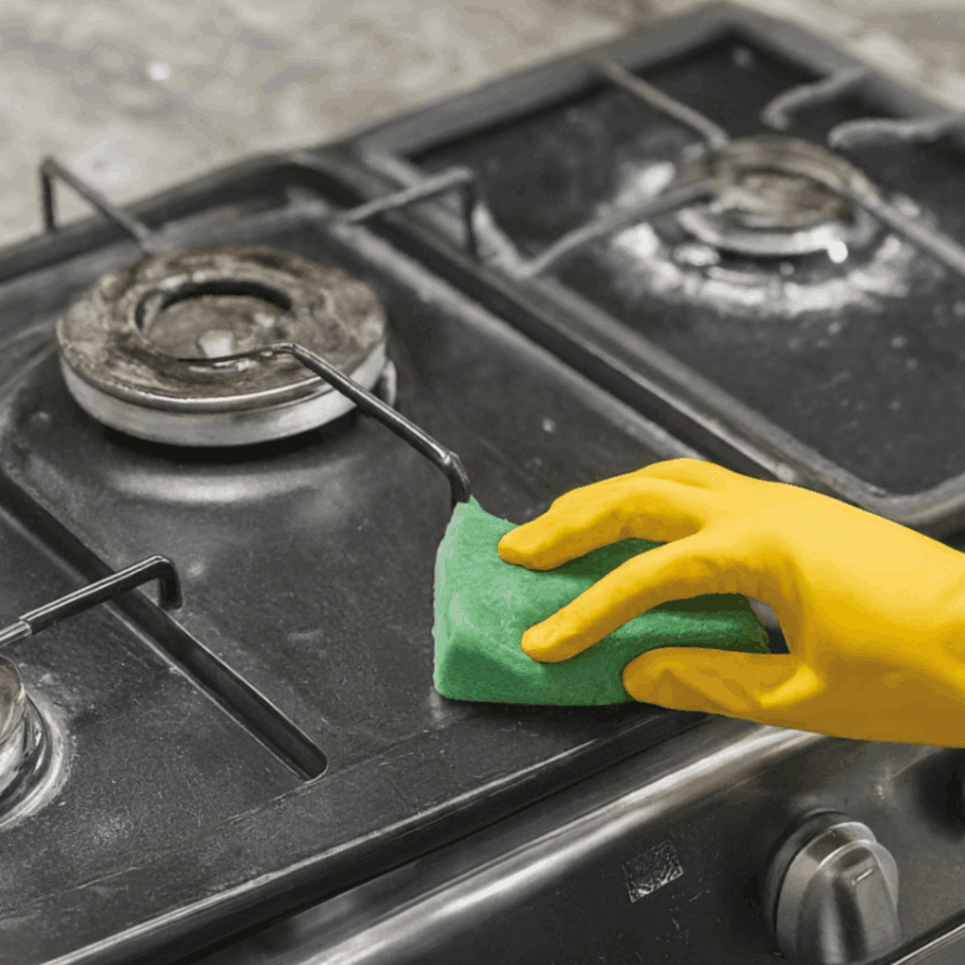
Maintenance Tips:
- Clean Burners and Grates: Remove food debris and spills regularly.
- Inspect Gas Lines: Check for leaks or damage if you have a gas stove.
DIY Steps:
Clean Burners and Grates
- Remove burners and grates.
- Soak in warm, soapy water.
- Scrub with a non-abrasive scrubber and rinse thoroughly.
Inspect Gas Lines
- Turn off the gas supply.
-
Final Words
Following these top 10 home maintenance tips ensures your home remains safe, efficient, and in excellent condition. Regular maintenance preserves your investment and provides a comfortable and secure living environment for you and your family.
related articles
 Discover First American Home Warranty Locations and What You Need to Know About Their Cover.
BY Victoria Baeker • 3 MINS READ
Discover First American Home Warranty Locations and What You Need to Know About Their Cover.
BY Victoria Baeker • 3 MINS READ Reviews of Home Warranty Companies Show You How to Determine If Your Home Is Covered
BY Victoria Baeker • 3 MINS READ
Reviews of Home Warranty Companies Show You How to Determine If Your Home Is Covered
BY Victoria Baeker • 3 MINS READ


- Free Instant Quotes
- Upto $200 Off
- Free Roof Coverage